The Ultimate Guide to Wave Accounting Software for Canadians
By Arthur Dubois | Published on 21 Feb 2023
Table of Contents
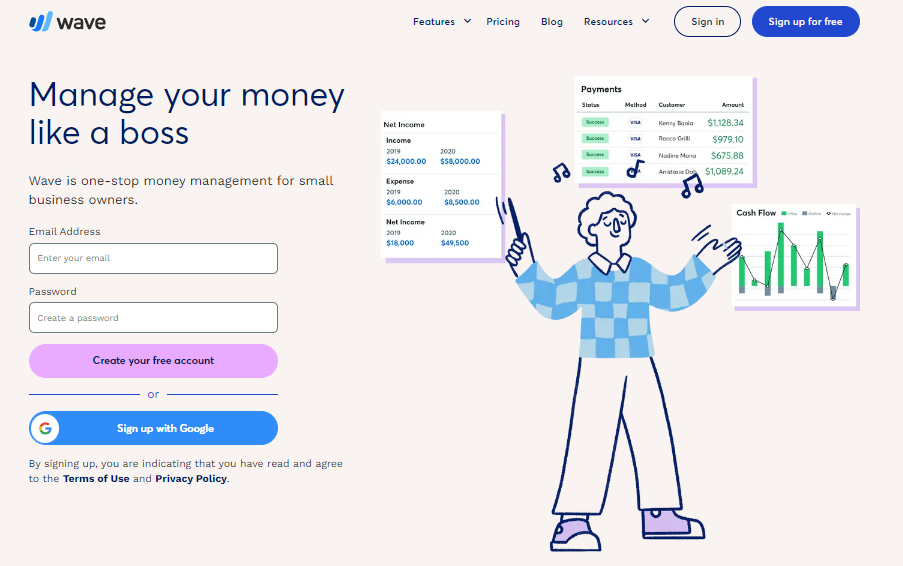
Wave accounting software is a company that offers free cloud-based accounting and invoicing designed for small businesses. Where other software applications offer free and premium paid tiers with more tools for more money, the Wave accounting software app, called Wave Accounting, allows small businesses to use its invoice, accounting, and banking tools for free.
This ultimate guide will show you how to sign up to use Wave quickly and operate its user-friendly tools.
Creating an account with Wave
It’s easy to create a free Wave account. Enter your email address and a password and click the “create your free account” button. You can also sign-up with a Google account. Wave will then walk you through the 4 steps to set up your account.
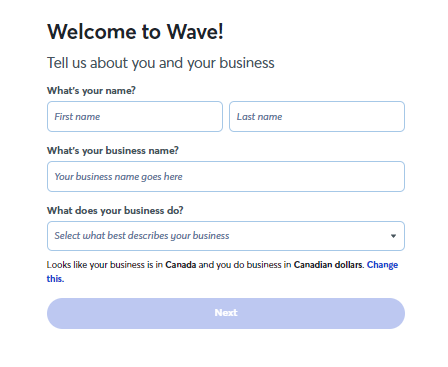
Step 1: Tell Wave about your business
Enter your first name, your last name, and the name of your business. Then indicate what your business does.
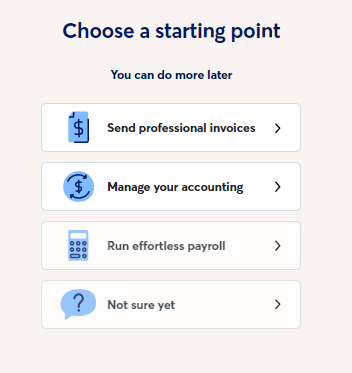
Step 2: Choose a starting point
Select one of the four starting points: “send professional invoices”; “manage your accounting”; “run effortless payroll”; or “not sure yet”. These are just starting points for Wave accounting software to get to know you and your business; you can do more later.
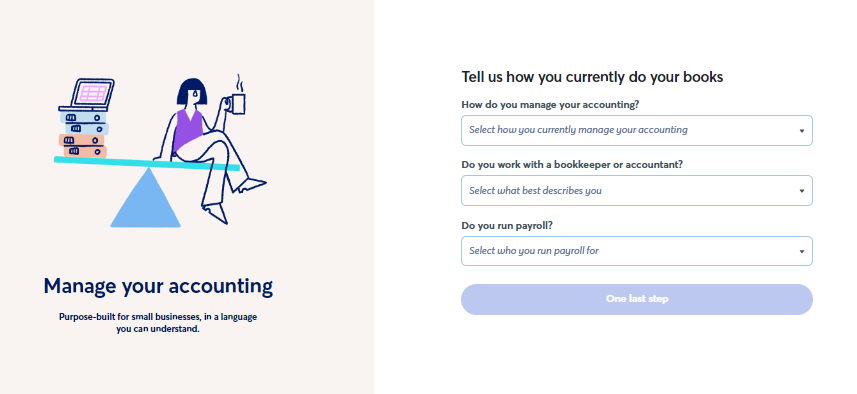
Step 3: Tell Wave how you do the books
Answer the questions asked given your selection in step 2. Again, these questions are only a starting point. Enter how you manage your business’ accounting, whether you work with a bookkeeper or accountant, and whether you run payroll. Then, click the “one last step” button.
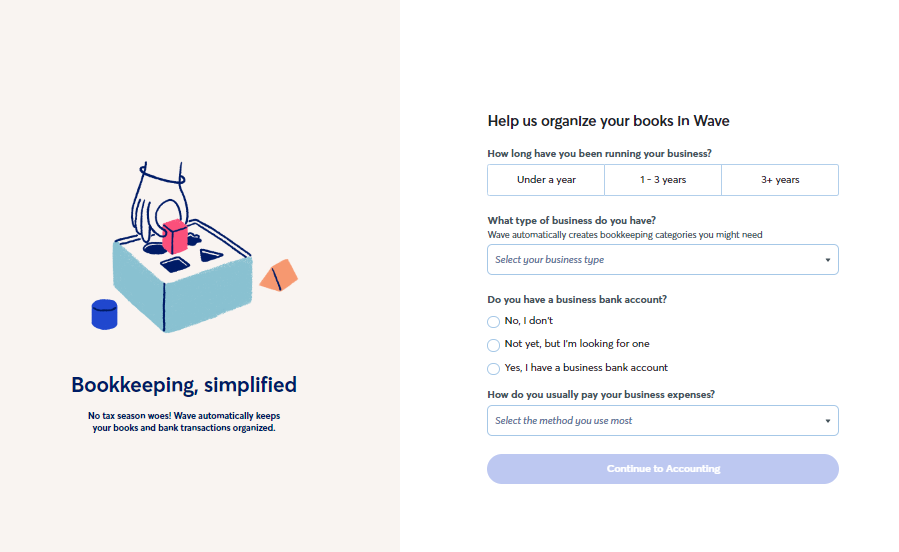
Step 4: Help Wave organize your books
The last step is to indicate how long your business has been running, what type of business you have, whether you have a business bank account, and how you usually pay your business expenses.
Your account view
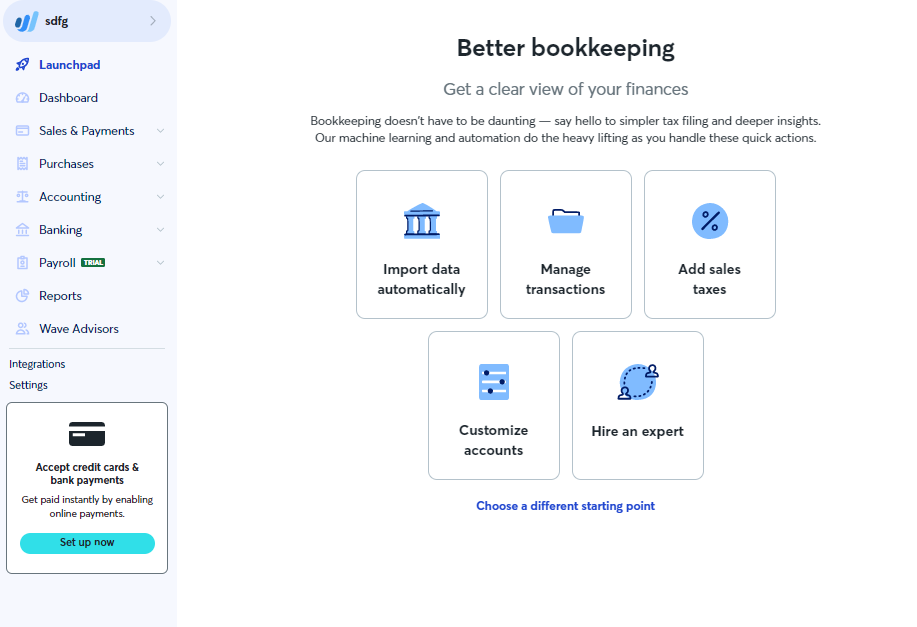
Once you have created your account and entered basic business information, Wave accounting software will suggest other areas for you to add further important business information. If you select “launchpad” on the left-hand navigation panel, Wave will provide you with a custom list of areas to explore and set up within the application. These include “import data automatically”, “manage transactions”, “add sales taxes”, “customize accounts” and “hire an expert”.
Wave dashboard
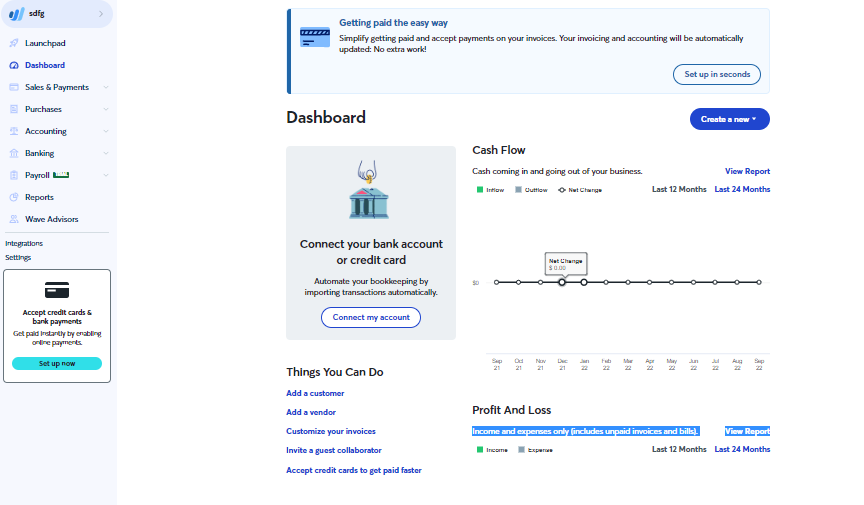
Below “launchpad” on the left-hand side navigation panel, the “dashboard” option allows you to see your business’s cash flow, profit and loss, payables, net income, and expense breakdown for the previous 24 months. You will notice different text boxes throughout the application when you first sign up. These are intended to prompt you to learn about a feature or complete a task. You can see these at the top, middle, and bottom left of the screenshot below.
A handy dashboard feature is the ability to find commonly used Wave application features by selecting the blue “create a new” drop-down button at the top of the screen. The drop-down menu allows you to choose the feature you are looking for quickly.
Options include creating transactions, estimates, and invoices; setting up recurring invoices; recording a bill; making a customer and vendor account; and adding products or services that you sell to your customers.
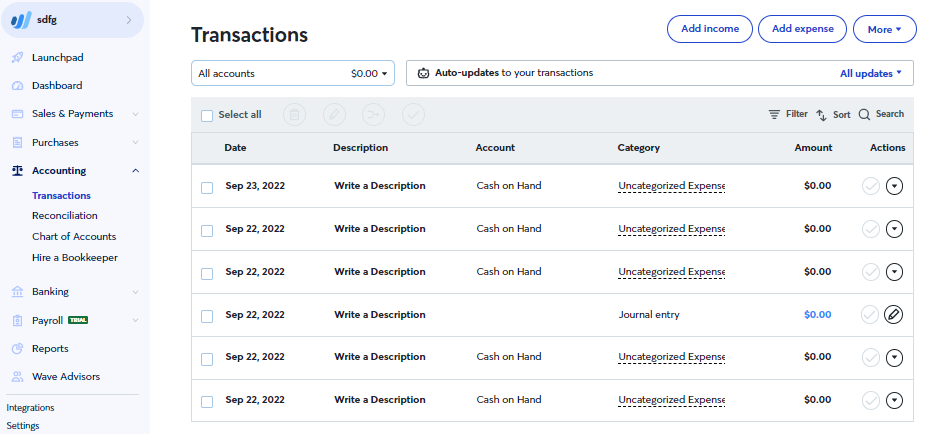
Creating transactions
By selecting “transactions”, you can manually enter business transactions such as income and expenses, and complete manual journal entries if required. You can get to the “transaction” page by selecting Dashboard > Create a New > Transaction, or by using the left-hand side navigation panel to select Accounting > Transaction.
It’s easiest to think of the “transaction” tab as a way for business owners to post directly to the general ledgers of their companies. The Wave accounting software also allows you to connect directly to the business’ bank account, and to upload bank statements directly. The application will automatically categorize transactions for you. You can use these features to quickly or automatically create income or expense transactions in the application.
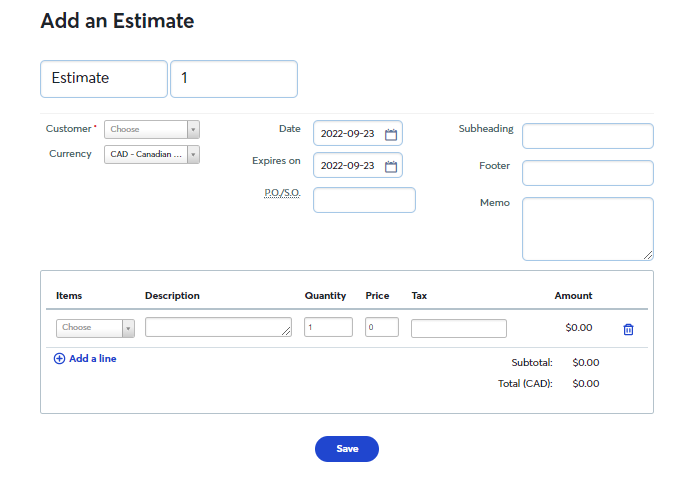
Creating an estimate
Wave Accounting software allows you to quickly create an estimate and send it to your customer for approval. Once approved, the estimate can be rapidly turned into an invoice.
You can find “create an estimate” by either selecting Dashboard > Create a new > Estimate, or using the left-hand side navigation panel to select Sales & Payments > Estimates > Create an Estimate.
Once you have clicked “create an estimate”, you will be asked to fill in the relevant information as seen in the screenshot below. On this form, you will be asked to add a title and a new or existing customer. You will also be asked to choose your currency, set the dates for which the estimate is valid, add a purchase order (P.O.) or shipping order (S.O.), and any required notes in the subheading, footer or memo boxes.
Under “items”, choose an existing product or add a new product. Add a description in the relevant box, and enter the quantity, price, and tax in their respective boxes. The values of the estimate will be created for you. Once everything looks correct, click the blue “save” button.
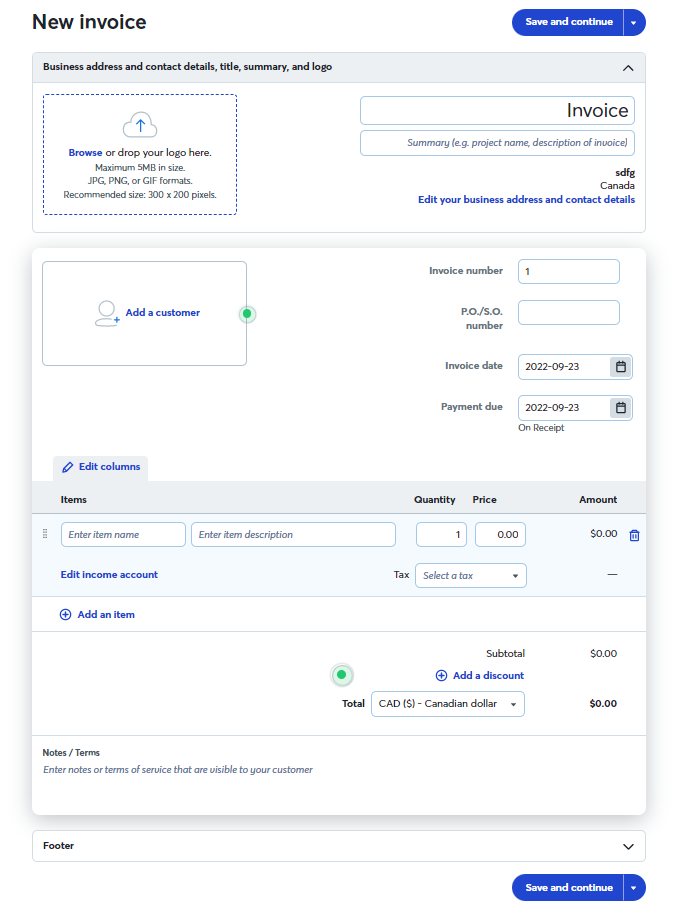
Create an invoice
You can create an invoice by going to Dashboard > Create a New > Invoice or using the left-hand side navigation panel to click Sales & Payments > Invoice.
You will be prompted to add your company’s logo, pick your accent colour, and choose a template. If you want to come back to these options, you can click “skip” and add these options later by going into “settings”.
Moving from the top to the bottom of the “new invoice form”, you can add your company’s logo and revise its address and contact details. It’s important to note that any business profile changes made in this form will automatically be applied throughout your Wave Accounting account.
You can choose an existing customer in Wave Accounting or add a customer. You can also create a new customer outside the “new invoice” form by using the left-hand navigation panel to select Sales & Payments > Customers > Add a Customer. You will need to add relevant P.O. numbers, invoice dates, and payment dates.
The final steps to create a new invoice are to enter the item name for the product or service you are selling, as well as a description, quantity, price, and appropriate sales tax. If this is the first new invoice you create, you will click on the “tax” field to create a new tax.
You may add further notes or terms at the bottom of the invoice. To save and send to your customer, or to save and record a payment you have already received, simply click the blue “save and continue” button and select the appropriate option.
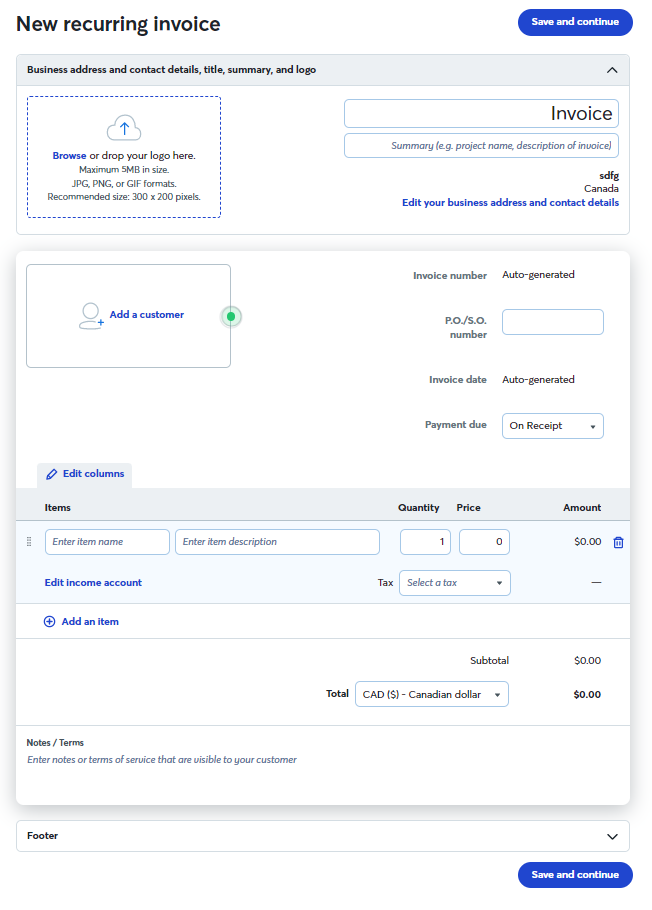
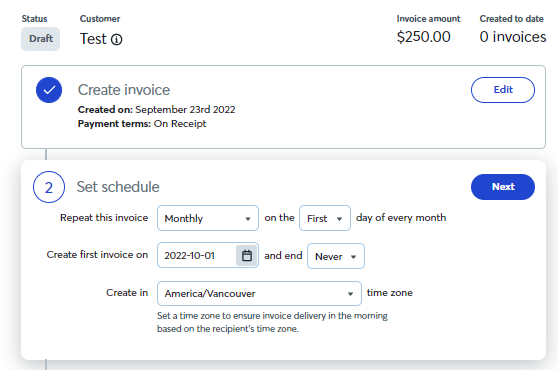
Create a recurring invoice
Depending on your company’s products and services, sending automatic recurring invoices to your customers on an agreed-upon schedule will save you time and effort.
To create a recurring invoice, select Dashboard > Create a new > Recurring Invoice > Create a Recurring Invoice, or use the left-hand side navigation panel to select Sales & Payments > Recurring Invoice > Create a Recurring Invoice.
The first step when creating a recurring invoice is the same as when creating a single invoice, as you can see in the screenshot below. Next, follow the “create an invoice” section instructions to enter the invoice details. Once you have filled out the form, click the blue “save and continue” button at the bottom of the invoice.
The second step is to set the recurring invoice schedule. Select what interval you want to repeat the invoice, the day the recurring invoice will first be sent, and the date it will be repeated each period. Once you have this completed, click on the blue “next” button.
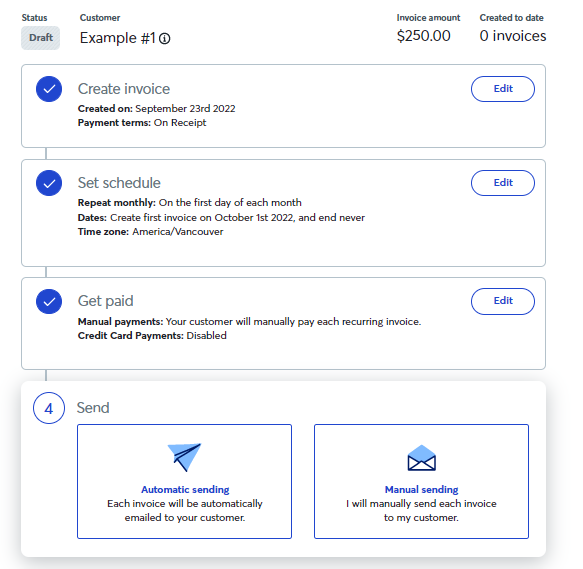
The third step when setting up a recurring payment is to select how your customer will pay you. To take advantage of the time and effort saved by using recurring invoices, you will need to select the “automatic payments” option. By doing this, your customers will automatically be charged the invoice value when they receive recurring invoices.
With automatic payments, follow-ups are no longer necessary for overdue invoices or other administrative tasks, like cashing a cheque. To move to the final step, select either “automatic payments” or “manual payments”, and click the blue “next” button.

The fourth step when setting up a recurring invoice and payment is selecting either “automatic sending” or “manual sending”. As is the case in the third step, selecting “automatic sending” will streamline the process.
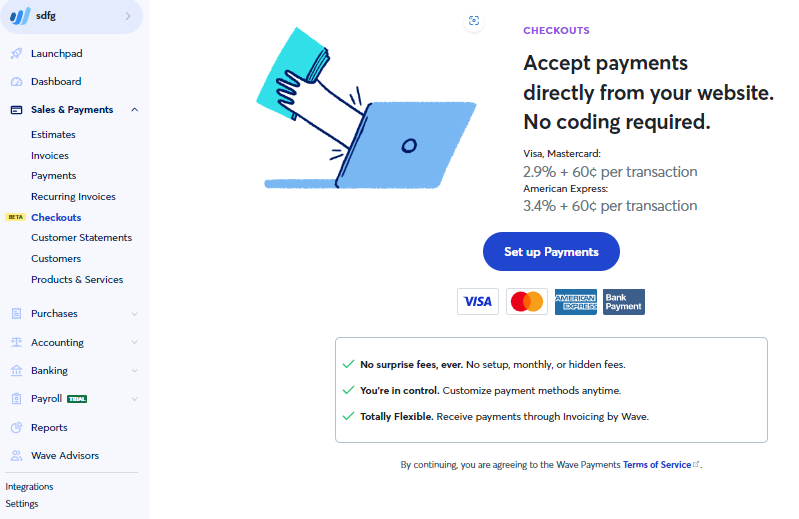
Checkouts feature
Wave accounting software currently offers a payment processing feature, called “checkouts”, which allows you to accept payments directly from your website. The fees are comparable to other payment process platforms for business credit cards and personal credit cards.
This feature also allows you to add new customers, generate current statements of accounts, remind customers of outstanding invoices, and create new products and services to include in estimates and invoices.
Record a bill
To record an expense, you can select Dashboard > Create a new > Bill, or use the left-hand side navigation panel to select Purchases > Bills > Create Your First Bill. First, select or create a vendor, bill date, due date, and add a bill number, notes, and P.O. or S.O. numbers, if relevant.
Next, select and add items, which are the products and services purchased. Then select the expense category, list the quantity (Qty), price, and tax, and select the blue “save” button.
Wave also allows you to add vendor products and services outside of the “add bill” form. You can see this below “bills” on the left-hand side navigation panel.
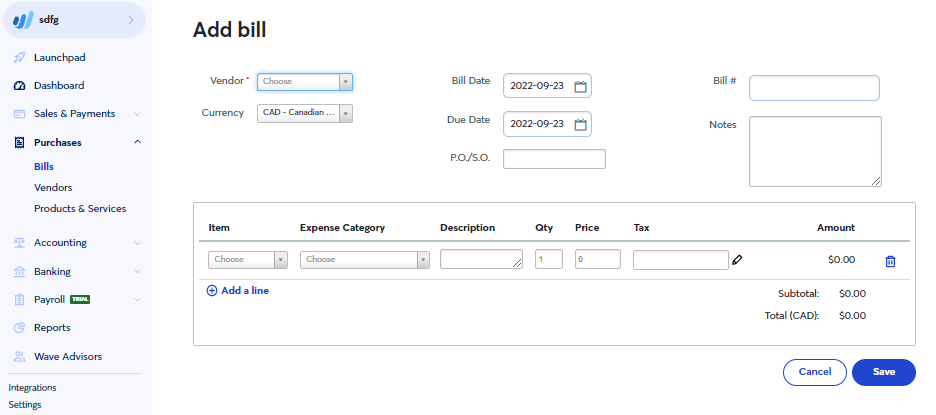
Chart of accounts
Your company’s “chart of accounts” can be found by selecting Accounting > Chart of Accounts. Wave accounting software has prepopulated standard accounts, but if you want to add a new account, simply click the “add a new account” button on the top right corner of the form. The chart of accounts will show all accounts you have created and a summary of what has been charged to each.

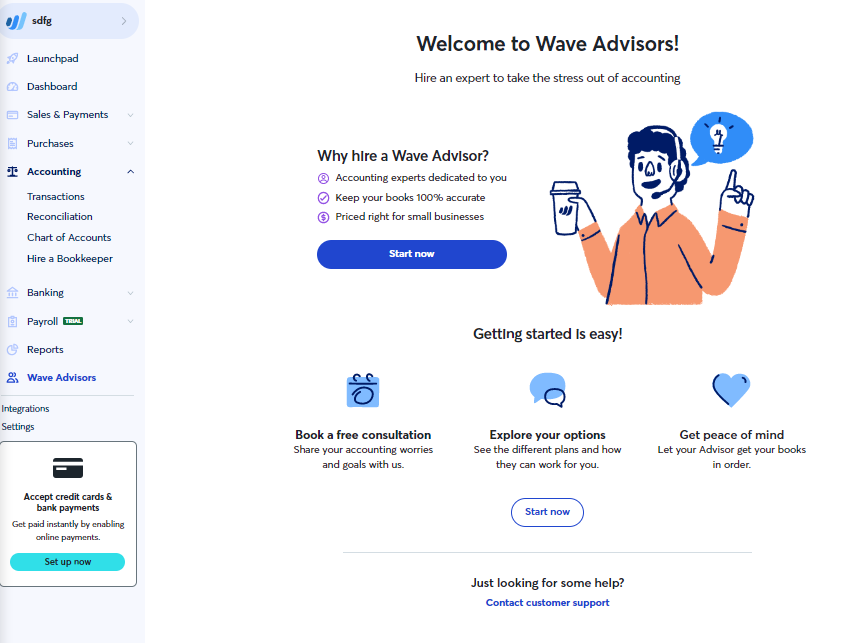
What is the “hire a bookkeeper” option?
While Wave is free and simple to use, it does offer the option of hiring a bookkeeper. Having a bookkeeper you like and trust will provide peace of mind and help ensure your books are accurate before sending them to a Chartered Professional Accountant (CPA) to complete your corporate income taxes. If you’re unsure whether you need a bookkeeper, Wave accounting software offers a free consultation.
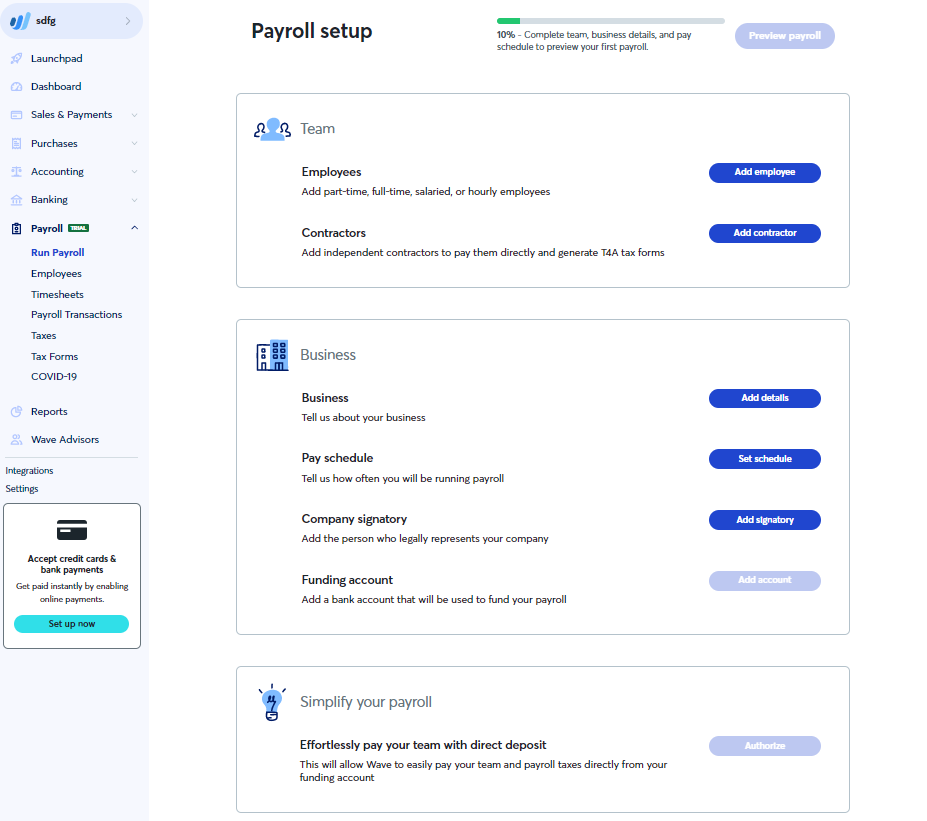
Payroll
The payroll features offered by Wave require a monthly payment of $20. You can access these features by selecting the “payroll” drop-down menu on the left-side navigation panel. First, select either “add employee” or “add contractor”, then enter their personal and payment information.
Next, add the relevant business information by selecting the blue “business”, “pay schedule”, “company signatory”, and “funding account” buttons. Then, authorize direct deposits to your employees or contractors.
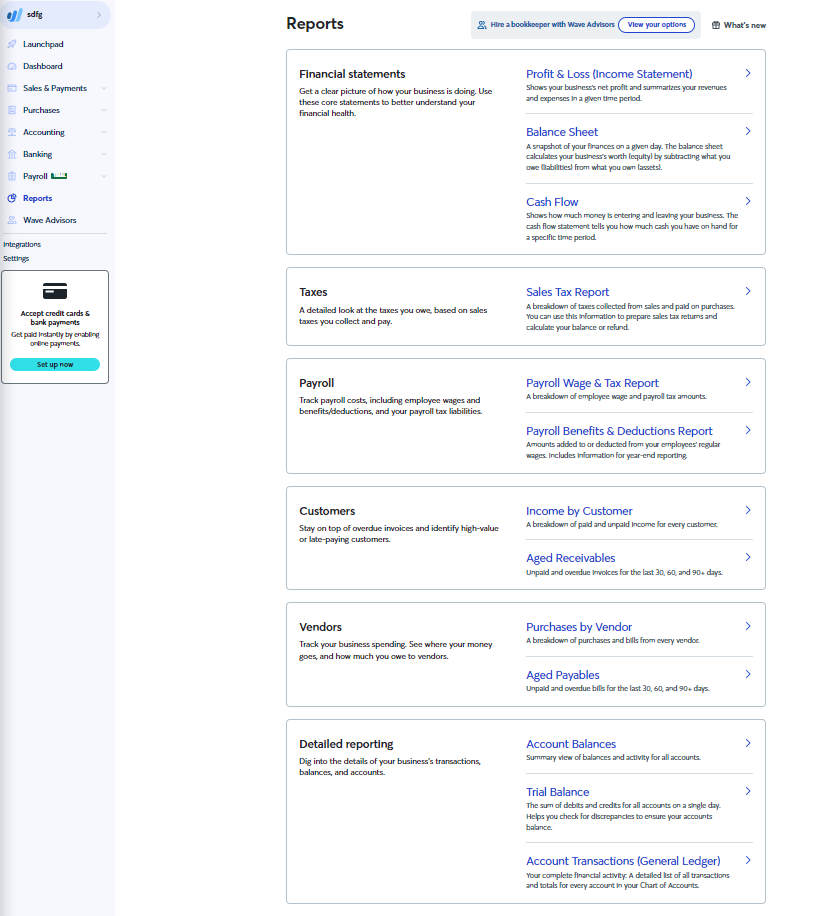
Reports
Wave Accounting offers a wide variety of useful reports by first selecting the “reports” option on the left-hand side navigation panel and then selecting the report you would like to generate. You can also export the reported information into your spreadsheet program for further use.
FAQ
Wave Accounting is a primarily free intuitive bookkeeping software for small businesses and freelancers. It also has the option to pay for a bookkeeper and payroll, and charges a percentage and transaction fee for each payment received using its “checkouts” feature.
Users of Wave Accounting have their data secured with 256-bit encryption, the same level of encryption used in online banking.
Wave’s application will guide you through the process of setting up your account. However, if you’re looking for step-by-step instructions, you should read the article above.
Yes, the majority of Wave Accounting features are free. However, you will pay to process business credit cards, personal credit cards, and payroll, as well as to use a bookkeeper.
Yes, Wave Accounting is safe to use and uses the same 256-bit encryption data security as online banking and shopping.
Wave Accounting has an app that allows users to scan receipts and send invoices. However, it does not have an app with all the features found in the web-based application.
You can track inventory by recording inventory, sales, and purchases. However, it is not straightforward for small business users to determine how many inventory items remain in different inventory accounts.
